Masahiko Kimura: Mastering the Art of Judo

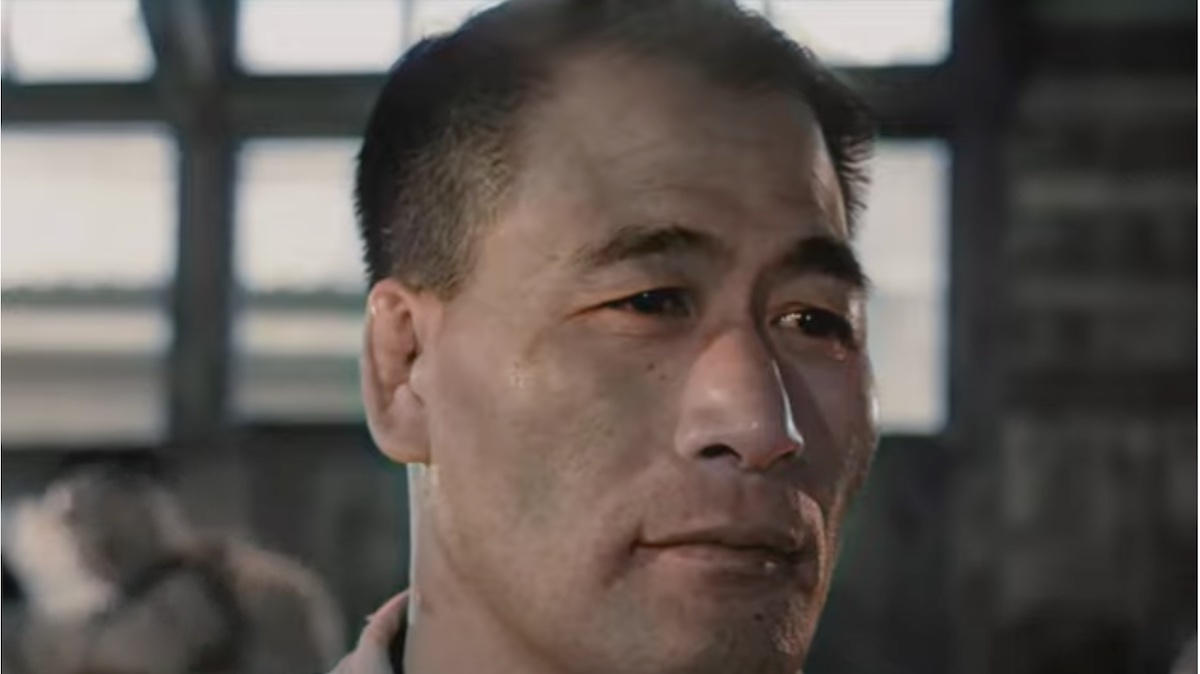
Masahiko KimuraMost know that the submission is named after him, but many don’t know the history of Masahiko Kimura. During his time, Kimura was one of the most accomplished Judoka that won numerous championships and shoot fights. Here is the story of the legendary Masahiko Kimura. Going over his time as an athlete and his grueling […]

Masahiko Kimura

Most know that the submission is named after him, but many don’t know the history of Masahiko Kimura. During his time, Kimura was one of the most accomplished Judoka that won numerous championships and shoot fights.

Here is the story of the legendary Masahiko Kimura. Going over his time as an athlete and his grueling training regimen. Also, of course, detailing his historical grappling match with Helio Gracie.

Masahiko Kimura’s Early Years

Masahiko Kimura was born on September 10, 1917 in Kumamoto, Japan. At the age of ten, Kimura would begin his Judo training.

From the moment Masahkio began his Judo training, he would be extremely dedicated. Quickly rising through the ranks and was already competing at a high level in his teens.

Kimura’s Competitive Career

Throughout his teens, Masahiko Kimura would win numerous low level competitions At the age of eighteen, he would compete in his first national tournament in 1935.

Successfully winning a national championship in his first attempt. Becoming one of the youngest national champions of all time.

This first national title would be one of the first of many as he would win his next five national Judo championships.

Masahiko Kimura at the Olympics

A year after winning his first national title, Masahiko would compete at his first Olympic event in 1936. Representing Japan in the lightweight division.

He would win his first three matches, but would lose his fourth match. Earning a bronze medal in his first appearance at the Olympics. 

Kimura was set to compete at the 1940 Olympics, but the event was canceled due to WW2. He would never compete at another Olympic event.

Kimura’s Competitive Career During the 1940/1950s

Despite not competing at the Olympics in 1940, Kimura would continue to actively compete throughout the 1940s and 1950s. Winning numerous other national championships.

On top of winning multiple national titles, Masahiko would also win the All Japan Championship four times three Kodokan Cups.

Then on the international scene, Kimura would win the Asian Games twice and earn three world titles. After winning numerous major titles, Masahiko would retire from Judo competition in 1955.

Masahiko Kimura vs. Helio Gracie 

What many know Masahiko Kimura for was the highly publicized match that he had with BJJ creator Helio Gracie. In 1951, Kimura was doing a tour of South America doing demonstrations and meeting with influential people.

During this time in Brazil, BJJ founder Helio Gracie had become known for laying down challenges. Of course, when Kimura arrived in Brazil, Helio would come to him and challenge Kimura to a grappling match.

At first, Masahiko had no interest in the match as he saw Helio as not worthy to face him in a match. This didn’t stop Helio and Carlos from calling on a match against Masahiko Kimura.

After badgering Kimura enough, he gave Helio an offer. If Helio could beat his teammate, Yukio Kato in a match, he would have a match with him.

Helio Gracie vs. Yukio Kato

The first match between Helio and Kato would take place on September 6th, 1951. Their fight would go for hours, but the fight would end in a draw.

Helio demanded a rematch that was accepted and it would take place on September 29th of that year. This time, Helio would pull the upset and win the match by choke. Earning his match with Kimura.

Kimura vs. Gracie

On October 22nd, 1951, the two sides agreed to a grappling match with altered rules for more grappling on the mat. A large audience would witness the match at Maracana Stadium in Rio de Janeiro.

From the moment the match began, Masahiko Kimura would keep control of the match. Immediately taking Gracie to the ground and putting down heavy top pressure.

Kimura would lock in the gyaku ude-garami or double wrist lock. Helio would refuse to tap, which resulted in Masahiko breaking his arm. Resulting in Gracie’s corner throwing in the towel.

After the match, both sides were very respectful and Helio congratulated Kimura on his victory. 

From that moment on within BJJ, the submission would be referred to as the kimura.

Masahiko Kimura’s Training Regimen

What set Masahiko Kimura apart from other Judokas and grapplers of his time was his training regiment. He took his training very seriously and would spend hours a day training.

Not only working on his technique, but also being methodical about his conditioning routine. Some publications have published what his supposed physical training routine may have looked like.

  • 1000 Push-Ups A Day
  • Bunny Hop 1 km
  • Headstand 3×3 mins
  • 100 Judo Throws
  • 100 Submission Drills
  • 100 Judo Entries
  • Multiple Rounds Of Randori(Sparring)
  • One Arm Barbell Lift
  • 200 Sit-ups(Decline/ On Partner’s Back
  • 200 Squats w/ 150 lb or Lifting Partner

It’s probably unlikely that he did all of this everyday, but doing a handful of these exercises are quite impressive. His dedication to doing any of these movements daily shows why he was a multiple time champion.

Masahiko Kimura’s Pro Wrestling Career

During the 1950s, Masahiko would also get into the world of professional wrestling. He even opened his own promotion called Kokusai Pro Wrestling Association.

Kimura would often compete in tag team matches with Rikodozen. The man is considered to be the very first Japanese pro wrestling superstar.

The two would compete with one another many times to sell out shows all across Japan. Even having a few friendly worked matches with one another.

The Incident between Kimura and Rikidozen

Since the two were the biggest attractions in Japanese pro wrestling, the two would set up a big match. Competing against each other for the Japanese Professional Wrestling Championship.

The initial plan was for this match to end in a draw to set up future matches and big payoffs for each wrestler. However, this is not what happened and their initial match would have an infamous incident.

During their match, the two were working together and selling for each other. This was until Rikidozen put Kimura in the corner.

Initially, Rikidozen was supposed to hit Masahiko Kimura with worked karate chops to his chest. Instead, he actually hit Kimura with a hard chop to the side of his neck. Knocking the Judoka unconscious.

Rikidozen then began “shooting” on Kimura with legit kicks and knees to his face. Forcing the ref to step in and announce Rikidozen the winner.

The pro wrestler had gone into business for himself. Going off script and legitimately hurting the Judoka, who had no idea what had happened or why. There would be no rematch.

Years later, Rikidozen would be assassinated in a Tokyo nightclub by a member of the Yakuza organized crime group. Initially, the police thought Kimura was their main suspect, because he had motive to get revenge after the shooting incident.

But witnesses at the nightclub would absolve Kimura of the accusation, as he was not present at the incident.

Masahiko Kimura Becomes a 10th Dan

After decades of competing, Kimura would retire and become a full-time teacher. His years of dedication to the martial art of Judo would earn him the 10th Dan. The highest rank that a Judoka can earn.

Kimura would teach his students everyday until he passed away on April 18th, 1993. He is widely regarded as one of the greatest Judokas of all-time.

The Legacy of Masahiko Kimura

Masahiko Kimura lived and breathed the art of Judo. His dedication was second to none and he left an incredible legacy.

Then of course, his name has been immortalized thanks to the submission being named after. The name Kimura will never be forgotten.

The Canto Choke – By Judo Olympic Champion Flavio Canto

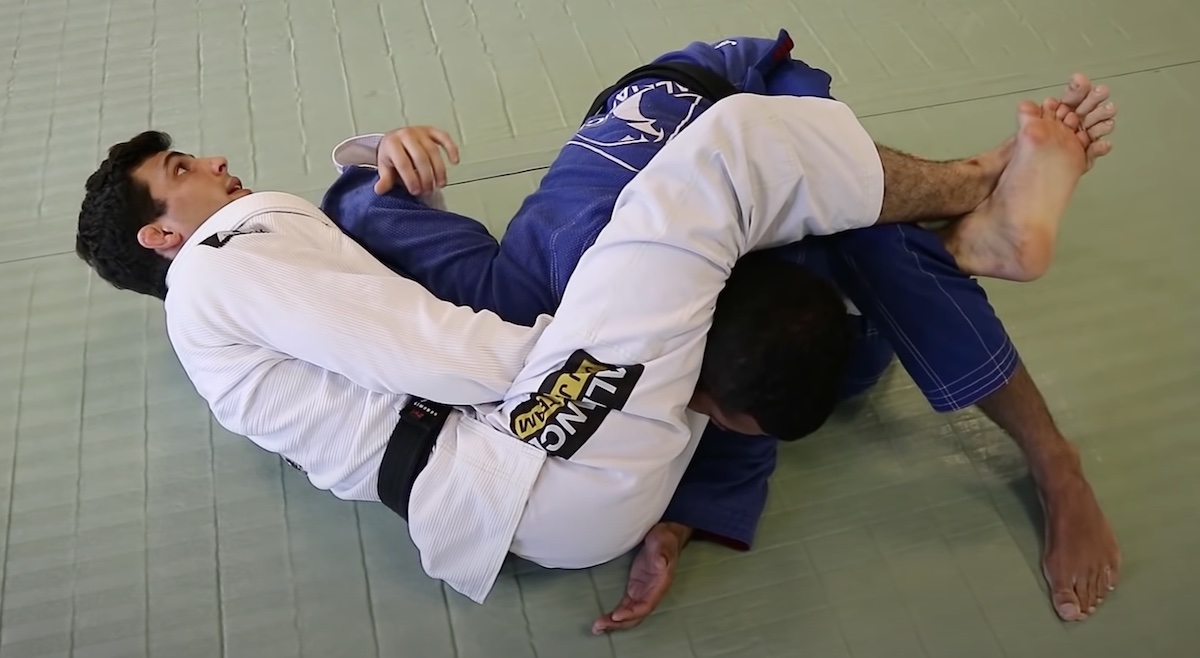
Canto chokeEasily one of the easiest and most versatile Gi chokes has to be the Canto choke. You can hit it from almost any position and leave your opponent confused at how fast it comes on. Here is everything that you need to know about the Canto choke. Going over who created the submission and how […]

Canto choke

Easily one of the easiest and most versatile Gi chokes has to be the Canto choke. You can hit it from almost any position and leave your opponent confused at how fast it comes on.

Here is everything that you need to know about the Canto choke. Going over who created the submission and how it has been innovated within Jiu Jitsu.

What’s a Canto Choke?

The Canto choke is a versatile gi submission developed by Judo Olympic champion Flavio Canto. It’s a quick choke that Flavio developed off of failed throws. 

In Judo, it’s common for athletes to be focused on defending throws and forget submissions. That’s why Canto began using his submission off of just one collar grip.

Flávio learned a similar collar choke from one of his coaches in Brazil. He adapted that choke off the same movement to create what people would call the Canto choke.

Once Canto began landing the choke in Judo competitions, it would quickly catch on. He would also share the technique with BJJ practitioners that loved the submission.

Since Flavio’s choke was introduced, it has become popular among Gi grapplers. It’s a great submission that’s easy to learn with numerous setups available, and it’s really effective.

The Canto Choke From Standing?

There are various setups for the Canto choke, but we’ll start with detailing the mechanics of the choke from guard. The same mechanics that are explained below will also work for a knee shield or in half guard.

Let’s start with the collar grip, which is the most important aspect of getting this choke. Take a semi-shallow collar grip on your opponent right at the side of their neck.

This is so you have a little slack that will tighten up to lock in the choke. Your opponent’s lapel will be able to slide right under their neck.

Next, before you go for your choke, you have to keep space between you and your opponent. Keep your bottom foot placed on your opponent’s leg and your hand framing on their arm.

Now, you can go into the Canto choke. Lift your hips as you slightly turn and chop your leg down as you pull your opponent in. 

The motion is pulling your grip at the same time you’re pushing down your leg on your opponent’s head.  Make sure to chop your leg down with force to keep your opponent’s posture broken, so they can’t defend.

This should be enough to finish an opponent that’s caught off guard.

Finishing Option #2

Sometimes, a tough opponent is able to pull their head to escape the choke. If this happens, you have the option of hooking your opponent’s arm with your top foot.

Slightly turn your body to give you the space to hook your opponent’s arm. You can now finish them from there or use your hook to turn your opponent to their back and finish.

Finishing Option #3

Your opponent might also react by standing up out of the choke. If they do this, there’s an easy counter you can do by hooking your foot under their leg. Just like a butterfly hook.

Slightly hip out to give you space to hook their leg and use it to push your opponent. Forcing them back to the mat and into a super tight submission.

Flavio Canto goes over how to do his move with the finishing options in this video.

Canto Choke From Standing

This submission can be set up from a variety of different ways from standing. Whether you fake a trip or throw.

The first step is to get your collar grip on your opponent. It doesn’t matter what fake you do, but what’s important is getting your opponent’s posture broken.

Once your opponent’s posture is broken you can pull them to the mat and go right into the Canto choke. Doing the same motion as you were pulling guard, but going right into the submission.

Follow the same steps to finish the choke as listed in the previous section and finish it how you wish.

Canto Choke From Half Guard

The Canto choke is actually very effective from on top in half guard. Your setup starts with you backing up to make your opponent react by moving into you.

Grab a hold of your opponent’s collar and cover your body over their top leg to block them. From there, you’re going to step over your opponent’s head and hook your leg at the back of their head.

Bring your feet together as you pull their collar to get the tap.

Canto Choke From Side-Control

This submission also works when you’re controlling your opponent in top side-control. Your first step is to get your collar grip and get an underhook on your opponent’s far arm.

Use your underhook to lift your opponent towards you to give you space to step over their head. Step over your opponent’s head, hook your leg behind their head, pull the collar, and finish the choke.

How to Defend Against The Canto Choke 

The Canto choke is really effective, but it’s rather easy to defend. Here’s how you defend against the Canto choke.

Defend Collar Grip

This choke begins and ends with the initial collar grip. If you defend the collar grip, you won’t have to worry about getting put in this submission.

Posture 

From the guard to defend the choke, always keep your posture like you would defend any other submission inside the guard. Keep your posture and avoid the choke.

Block the Leg 

Your opponent needs to hook the back of their leg around your head to lock in the sub. If you block their leg from hooking your head, it’ll stop the choke even if they have your collar.

Tuck Head

Another defense that you can do from both on top and bottom is to keep your head tucked. When your carotid artery isn’t exposed, it’ll help you defend and escape.

Important Tips for Hitting the Canto Choke

The Canto choke is easy to learn, but there’s small details that you’ll need to remember to successfully land it. Here are important tips you need to remember for landing the Canto choke.

  • The Collar Grip: This choke begins and ends with your collar grip. If you don’t have a good grip against your opponent’s neck, you won’t land the submission.
  • Leg Positioning: The back of your knee/calf must be pressed right on the back of your opponent’s head. 
  • Kick Down: You have to kick down your leg with force on the back of your opponent’s head. Doing this gives you a better choke and keeps them from being able to posture up.
  • Pull: As you’re kicking down your top leg, you have to pull your collar grip down. These two motions together are what make the choke work.
  • Make Space: From the bottom position, you have to make space in order to set up your choke. If you don’t have space, you will not get the submission.
  • Finishing Options: Remember the three finishes options you have for this submission. Depending on your opponent’s reactions, you can finishing it straight on or hook their arm or leg.

Uchi Mata Judo Throw

Uchi MataKnowing Judo techniques is a must if you wish to improve your grappling game. One of the core techniques that you should know how to execute is uchi mata. Here is everything that you need to know about the uchi mata throw. Going over various setups for the throw and list important tips to remember […]

Uchi Mata

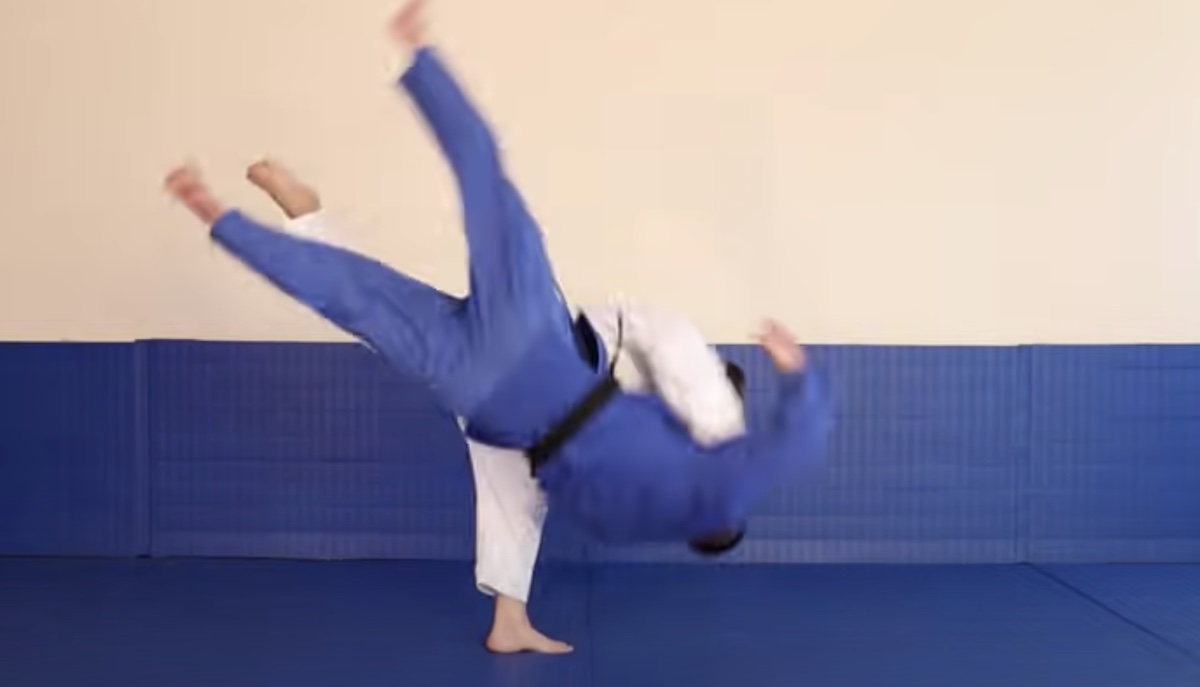
Knowing Judo techniques is a must if you wish to improve your grappling game. One of the core techniques that you should know how to execute is uchi mata.

Here is everything that you need to know about the uchi mata throw. Going over various setups for the throw and list important tips to remember for executing this technique.

What is an Uchi Mata

Uchi mata is one of the core Judo techniques developed by Jigoro Kano. In English, the uchi mata throw translates to “inner thigh throw. 

It is one of the most effective and popular throws within the grappling art of Judo.

To execute uchi mata, you  step forward with one leg, while the other leg is placed between your opponent’s legs. As your opponent comes forward, you load them and kick between their legs to kick them over

What makes uchi mata so effective is that it can be set up in numerous ways. As either an offensive attack or a defensive counter.

It can be a direct attack, set up off a fake, or to counter an attacking a pressing opponent.

In MMA, the throw has been proven very effective in grappling situations with striking involved. One of the best at this throw was MMA vet and Judo ace Karo Parisyan. 

Today, uchi mata is a must know throw, whether you compete in grappling or MMA.

Uchi Mata vs. Harai Goshi

Another throw that beginners often confuse with uchis mata is harai goshi. They do look similar and have the same steps, but they have one distinct difference.

In the uchi mata throw, you target the opponent’s inner leg. Harai goshi targets the opponent’s far leg.

The great thing about these two throws is that their mechanics are nearly the same. You could fake one of the throws to set up the other to keep your opponent off balance.

The Basic Uchi Mata 

The basic uchi mata like most all pulling throws in Judo starts with a lapel and arm grip. Aim to grab a good amount of fabric right above your opponent’s elbow.

You’re going to use these grips to pull your opponent towards you in a slightly upward direction. With your arm grip, rotate your elbow upward as you pull your opponent toward you. Doing this also helps you in guiding the direction of your throw.

Next is the footwork for the throw. You’re going to do a complete 180 and face the same way as your opponent. 

Your support foot needs to land right between the feet of your opponent. The sweeping leg needs to swing right between your opponent’s legs. Make sure that the toes of your sweeping leg are pointed down.

As you pull your opponent forward into the throw, you need to create hip on hip contact with them. When you achieve this and correctly do the footwork, your opponent should go up with ease.

No-Gi Uchi Mata

Let’s switch it up and detail the No-Gi version of uchi mata. Of course, there’s going to be an alteration in the grips since you don’t wear a Gi in No-Gi Jiu Jitsu.

Like in the Gi, there’s numerous different setups, but we’ll detail the throw from an underhook. To get the underhook, you first have to set it up with a collar tie.

Grab a collar tie to break your opponent’s posture. In the moment, they go to recover, grab your underhook on the opposite side. Your other hand will be holding wrist control on your opponent’s other arm.

From here, you can do various setups to go into uchi mata, but we’ll just go over the throw itself. Hook the inner thigh of your opponent, step in, connect your hips together, and take them up for the throw.

Easy Uchi Mata Entry

This technique for the throw is great for beginners just learning the throw. It starts the same as the other techniques previously explained with inside control.

What you’re going to do first is take your sweep leg and attach it to your opponent’s inside leg. Doing this allows you to do a cheat step and jump into the throw.

Just pull yourself into your partner as you pull them up and go right into the throw.

Belt Grip Uchi Mata

This set up with a belt grip can be done with just three steps and ends in a forward roll. Grab your opponent’s lapel down to break their posture and step in to grab their belt.

From there, you’re going to go into a rolling variation of the uchi. When you step in and turn, look to the floors, base your hand on the mat, and roll your opponent over.

Overhook Uchi Mata

An uchi off an overhook control is a great option to set up this throw. It’s great in both Gi and No-Gi, but we’ll detail the Gi version from this section.

When you’re hand-fghting, grab a deep underhook on your opponent and cross grab their far lapel. Use this grip to compromise your opponent’s posture. You can either finish the throw with a traditional uchi or do a rolling variation.

Cross Grip Uchi Mata

For this variation, you’re going to take a cross grip on your opponent’s lapel and a sleeve grip. You’re going to do the same footwork as the traditional throw, but with a slight twist.

When you step in, lift your elbow on your lapel grip arm. This breaks your opponent’s posture and helps you in getting them up for the throw. 

This video details the last four variations of the throw.

Uchi Mata For BJJ

The last variation of this throw that we’ll detail was created specifically for BJJ. In Judo, the traditional setup doesn’t account for possible single or double leg attempts by your opponent.

For this setup, you’re going to take a standard lapel grip and sleeve grip. This type of sleeve grip is illegal in Judo, but perfectly fine for BJJ. 

It also helps block your opponent if they attempt a takedown since you’re controlling their arm. Your entry with your lead foot is also going to be a bit different.

Step your lead foot in right next to your opponent’s lead foot and turn it inward. From there, just step your base foot behind your lead foot and go right into the throw.

Importing Tips You Need to Remember For Executing Uchi Mata 

Uchi mata is a great throw, but you cannot forget a single detail when executing this technique. Here are important tips you need to remember for executing uchi mata.

  • Lifting Opponent’s Arm: On the pull, you need to remember the proper direction that you’re pulling your opponent. You need to pull them at an upward angle forward.
  • Turning Elbow: Another detail that you need to remember on the throw is the turn of your elbow. Turn the elbow of your arm grip upward and in like you’re checking the time on your watch.
  • Support Foot Placement: Your support foot needs to be placed right between your opponent’s feet. Anywhere else and the throw will not work.
  • Sweep Foot Placement: Your sweep foot needs to kick right between your opponent’s legs.
  • Toes Down: Make sure that the toes of your sweep foot are facing down when you sweep your foot into position.
  • Hip Contact: Remember that you need to have hip on hip contact to successfully execute uchi mata.

Ashi Garami Position

Ashi garamiIn grappling, leg locks are being practiced now more than ever before. One of the best leg entanglements that you need to know is the effective ashi garami position. Here is everything that you need to know about the ashi garami leg position in grappling. Going over how to get into the leg entanglement, executes […]

Ashi garami

In grappling, leg locks are being practiced now more than ever before. One of the best leg entanglements that you need to know is the effective ashi garami position.

Here is everything that you need to know about the ashi garami leg position in grappling. Going over how to get into the leg entanglement, executes different leg locks, and how to defend against it.

What is the Ashi Garami Position

Ashi garami is a leg entanglement that was first developed within Judo. Later on other forms of grappling like BJJ and MMA adopted the position.

The goal of obtaining this position is to attack your opponent’s feet with a type of leg attack. Whether it be with ankle locks, toe holds, or heel hooks.

There are different variations of ashi garami, but the original position involves triangling your legs around your opponent’s leg. Your foot goes on your opponent’s hip, while your other foot hooks under their knee. 

Then to lock on the position, you aim to connect your knee to your foot to lock in ashi garami.

This creates a powerful entanglement that can be used to off-balance the opponent and set up submissions such as heel hooks or ankle locks.

Ashi garami can be used both offensively and defensively. Offensively, the person in the position can attack their opponent with various leg attacks. Defensively, they can use it to prevent their opponent from passing their guard or escaping from other positions.

Since the rise in popularity of professional No-Gi grappling, leg locks have become more widely used. The entanglement that most of the most popular athletes like Gordon Ryan and Garry Tonon use is ashi garami.

This is why many leg lock experts choose to use variations of this leg position to attack their opponent. If you’re serious about learning leg locks, the ashi garami is one of the best leg entanglements to use.

How to Hold Ashi Garami

Let’s go over how to properly hold the ashi garmi leg position. You have to remember the three points of control when doing any leg entanglement. Control your opponent’s hip, above their knee, and their foot.

For this position, your outside foot needs to be pressed against your opponent’s hip. Then your inside knee needs to be folded and closed above your opponent’s knee.

Putting your knee and foot in these positions creates a triangle around your opponent’s leg. Limiting your opponent’s movement and giving your different attack options.

Inside vs. Outside Ashi Garami

There are various types of ashi garami, but they basically fall into two categories. Inside and outside, which are pretty self explanatory.

The inside version has the opponent’s foot placed against your inside hip. Then the outside variation has the opponent’s foot against your outside hip.

What Attacks Are Available From Ashi Garami?

There’s a wide variety of attacks open from this leg entanglement, which makes it popular for leg lockers.

You have everything from:

Entries Into Outside Ashi Garami

There’s a wide variety of different ashi garami entries. Check out a few of the best entries that you should consider using.

The Slide-In

The slide-in is probably the most basic entry into the position that you should learn first. It starts from standing and you can start the entry like you’re either hitting an arm drag or a single leg.

Match your opponent and place the same foot that they have in front. You’re then going to level change down and cup behind your opponent’s knee as you sit down.

Next, pull your opponent towards you as your outside leg goes between your opponent’s legs. Hooking around their leg and placing your foot on their hip.

Then after you place your foot on your opponent’s hip, attach your knee above your opponent’s knee. Be sure to use a butterfly hook on your opponent’s other leg as you place your knee above their knee. This will prevent them from being able to step back.

To get your opponent to the mat, you’re going to use a false heel hook grip. As you get heel exposure, use your grip to turn your opponent as you kick your leg down.

Getting your opponent to the ground and opening the door to hit your heel hook.

Butterfly Guard To Ashi

This is another easy entry that you should drill starts from the butterfly guard with your opponent standing(or on a knee). As you hand fight with your opponent, grab the outside of their leg above their knee.

Use that grip to pull yourself into them and start your leg positioning for the entanglement. Your outside leg slides between your opponent’s legs and comes around the outside of the leg you’re attacking.

Keep your foot pointed outwards on their heel and close your knee above your opponent’s knee.

Butterfly Sweep to Cross Ashi

Butterfly sweeps can put you right into ashi positions and there’s a really slick one to put you into cross ashi. It’s great to use at tournaments, where you’re not allowed to heel hook and get two points.

From butterfly guard, grip your opponent’s tricep and the back of their head. Use these grips to try and pull them forward. When you do this, they will most likely resist being pulled forward.

As you lift up your opponent, take off one of your hooks and they fall right into the cross ashi position.

De La Riva Knee Bump Ashi Entry

Another great entry that you can use is a knee bump from the De La Riva guard. For this entry, you’re going to hold a modified DLR.

Take your inside leg and lock it on top of your DLR hook. Tilt your legs to the outside to knock your opponent off balance. 

Once they try to regain their balance, this is your queue to pummel your legs and go into ashi. 

How to Defend Against the Ashi Garami

Even if you don’t like attacking legs, more grapplers use them more than ever and you must know the defenses. Here are some methods that you can implement to defend against the ashi garami position.

Defense From Standing

The first defense that you should go to is to open your opponent’s legs. Grab your opponent’s heel with one hand and their knee with the other.

Use these grips, open their lock and immediately step forward to attempt to take the mount on your opponent.

Defense On the Ground

Being stuck in an ashi variation on the ground is more dangerous due to your opponent being closer to an attack. This means that you have to act fast.

You’re going to do the same defense as you did from standing. Grab hold of your opponent’s knee and heel to open their control step forward.

Important Tips to Remember for Holding the Ashi Garami Position

Using the ashi garami gives you optimal control over your opponent, but you have to use it correctly. Here are some important tips that you need to remember for holding the ashi garami position.

  • Remember The Rule of Leg Control: Remember the three points of leg control when going into any type of leg entanglement. Control the hip, above the knee, and foot of your opponent.
  • Point Foot Outwards: Keep your outside foot on your opponent’s heel pointed outwards. If you point it inwards, your opponent can attack your foot or easily escape.
  • No Space: You cannot give up any space when you do this leg entanglement or any other type. Any open space gives your opponent the opening to escape the position.
  • Make A Triangle: Your legs have to be in the shape of a triangle with the ashi garami position. Try to attach your inside knee to your outside foot around your opponent’s leg.
  • Foot To Hip: Keep your outside foot connected to your opponent’s hip.
  • Close Your Knee: Always close your inside knee above your opponent’s knee. This limits the movement of your opponent.

Kesa Gatame Side-Control

kesa gatame JudoIf you’ve ever rolled with a Judoka in Jiu Jitsu, then you know that they love using heavy top pressure. Particularly using the kesa gatame style side-control. If you’ve never used this type of side-control, here is everything that you need to know about kesa gatame. Detailing how you hold it, attacks, and tips for […]

kesa gatame Judo

If you’ve ever rolled with a Judoka in Jiu Jitsu, then you know that they love using heavy top pressure. Particularly using the kesa gatame style side-control.

If you’ve never used this type of side-control, here is everything that you need to know about kesa gatame. Detailing how you hold it, attacks, and tips for using this form of control.

What is Kesa Gatame? 

Kesa gatame is a form of top control used in grappling, which is called side-control in Jiu Jitsu. Some also refer to this control as the “scarf hold position.”

To perform the kesa gatame side-control, you straddle the side of your opponent’s body. Placing the side of your midsection directly on your chest with your legs stretched out.

There are three variations of kesa gatame:

  1. Traditional kesa gatame with head and arm control.
  2. Kesa gatame with an underhook and overhook.
  3. Reverse kesa gatame, where you’re facing your opponent’s feet.

This style of side-control provides optimal control over your opponent, while giving various attacks to choose from.

Whichever style of grappling you practice, you should definitely consider using kesa gatame.

How to Hold Kesa Gatame? 

Before we get into the various attacks from this side-control, you need to know how to hold it. Here is how you hold kesa gatame side-control.

The first thing that you need to know about holding this form of side-control is body positioning. Connect the side of your body right on the center of your opponent’s chest.

If you lean too far over your opponent, they will roll you over. Or if you’re too far off their chest, they will either recover guard or stand up.

Your legs also need to be specifically placed. Either have both legs slightly stretched out or placed your inside foot on the mat as an anchor.

Next is how you control your opponent’s head and arm. Grab above their elbow and lift it up as you hug around their head and also lift it up. Practice all of these steps to hold a secure kesa gatame side-control. 

(Note: You can also cup your leg with the hand hugging your opponent’s head for better control and produce more pressure.)

Kesa gatame

Holding Other Kesa Gatame Variations

Holding the variations of kesa gatame have the same principles, but with a few different details. Here is how you hold the variations.

For the overhook/underhook variation, you need to be cupping your opponent’s arm with your underhook hand. Keeping both of their arms slightly off the mat to have a better hold of the position.

When you hold the reverse kesa gatame, hug your opponent’s body to close off space. Also scoot your body slightly up towards your opponent’s head to limit the movement of their arms.

Kesa Gatame Americana(w/Legs)

The first attack that we’ll detail is the americana arm lock with your legs. Also called the scarf hold armlock in catch and Sambo.

To start the setup, keep your arms connected, and place the blade of your wrist under your opponent’s elbow. Raising up on their elbow will create pressure that could make them tap or cause them to raise their arm.

Push your opponent’s arm towards your leg and hook it at your wrist. S-grip around your opponent’s head and pull up on their head as you pull your leg back to get the tap.

Kesa Gatame Straight Arm Lock(w/Legs)

Sometimes your opponent will straighten their arm to escape your americana lock with your legs. This gives you the opening to lock on a straight arm lock.

Hook your top leg over your opponent’s arm as you bring your bottom leg against their arm. Push your bottom knee up as you press your top knee down to lock on the submission.

Bicycle Kick Arm Lock

The straight arm lock may not work if your opponent keeps their thumb down. If this happens, you can go to the bicycle kick arm lock variation.

To do this arm lock, scoot your body a little deeper in as you come on to the sole of your inside foot. Your outside leg is going to kick down like you’re riding a bike to put on this arm lock variation.

Kesa Gatame Kneebar

When holding kesa gatame, a lot of BJJ guys will try to elbow escape and take your back. Attempting this escape gives you the opportunity for a kneebar.

When your opponent’s heel comes over your leg, you’re going to do a backstep with your inside leg. Then you’re going to let go of your control and  grab your opponent’s leg with both hands at the ankle/heel.

Hug your opponent’s leg to your body, as you pinch their foot to your head. From there, just arch your hips to lock on the submission.

You can see the breakdown of the four previous techniques in this video.

Kesa Gatame Chest Compression

If you’ve seen the match from Metamoris 4 between Josh Barnett and Dean Lister, then you saw this choke. It’s a super powerful chest compression choke that’s similar to an arm triangle.

The setup starts from holding classic kesa gatame and cupping your thigh with your arm around your opponent’s head.

From here, you take off your arm control, swim your hand in, and pass your opponent’s arm across. Pinching their arm against your head and should to keep them from framing.

Next, switch your hand grips to a reverse S grip, and pull your opponent’s head to your chest. The pressure comes on quickly and your opponent feels like their head is getting squeezed off.

Kesa Gatame Arm Triangle

If you prefer, you can also  go to a traditional arm triangle  from the same control. Do the same swim move with your top arm to force your opponent’s arm across their body.

Next, keep your grips and switch your base to keep your body flat against the mat and next to your opponent. Take a deep breath and squeeze with your body to lock on the pressure and get the submission.

Watch this breakdown to see how to do the two previous techniques.

Kesa Gatame Escapes

Kesa gatame can be miserable to be stuck under. That is why you need to learn a few ways to escape this form of side-control.

Leg Hook

The first escape that you can use is the leg hook. It’s great if you have long legs and/or are flexible. 

Simply turn to your side, hook your leg over your opponent’s leg, and escape the position. This is a good escape to use if your opponent’s outside leg is based up on their foot.

Bridge & Roll

If you can’t hook your opponent’s leg, the next escape that you should try is the bridge and roll. Start the technique by hugging your opponent’s belt or waist if you’re training No-GI. Keep a tight hold as you bridge your body to get your opponent up and roll them to the side.

Fram & Push 

The frame and push escape is a good one to use when your opponent is holding side-control too low. All you do is frame on their neck, walk your feet out, push, and escape.

Blending Them All Together

In a live roll, you should aim to try and mix all of these escapes together. Never try to go to just one escape if it doesn’t work the first time you try it.

Go from one escape to the other and keep attempting them until you find a weak point in your opponent’s control.

Check out how to do all of these escapes in this breakdown.

Important Tips to Remember For Holding Kesa Gatame

Using kesa gatame is a great form of side-control to use, but you need to know how to properly hold it. Here are some important tips to remember for holding kesa gatame.

  • Weight Centered: Keep your weight centered right on your opponent’s chest. If you’re off on either side, your opponent can easily escape.
  • Arm Control: For the best control, hold your opponent’s arm above the elbow, and pull up on it.
  • Leg Positioning: Don’t tuck your legs in or overly stretch them out. Your opponent will either roll you over or easily elbow escape out of side-control.
  • Watch The Underhook: Be sure to defend the underhook. Your opponent will be trying to get the underhook to escape.
  • No Space: Whichever style of kesa gatame you use, remember to give up no space between you and your opponent. Stay tight on them to keep optimal over them.

Southpaw vs Orthodox

Southpaw vs OrthodoxIf you’ve trained in a striking martial art, you have studied the differences between a southpaw vs orthodox fighter. It is extremely important for your development to know how to fight and defend against both fighting stances. That’s why we’re breaking down everything you need to know about the southpaw vs orthodox fighting stances. Going […]

Southpaw vs Orthodox

If you’ve trained in a striking martial art, you have studied the differences between a southpaw vs orthodox fighter. It is extremely important for your development to know how to fight and defend against both fighting stances.

That’s why we’re breaking down everything you need to know about the southpaw vs orthodox fighting stances. Going over the differences of the stances and how to deal with fighting against them.

What are the Differences Between a Southpaw vs Orthodox Fighting Stance?

Just from looking at the two fighting chances, anyone can clearly see the differences between a left or right-handed fighter. But let’s go over the differences between a southpaw vs orthodox stance.

Feet Placement

The two stances are reversed from the other and are like a mirror. An orthodox fighter keeps their left leg in front and their right leg as their base leg. A left-handed fighter is the opposite where their right foot is in front and their left leg is in the back.

Hand Placement 

Just like with their feet, the hand placement is also different between a right and left-handed fighter. A right-handed fighter has their left hand in front and their right hand in the back. Southpaw fighters are the opposite with their right hand in front and their left in the back.

Power Hands 

Fighters will traditionally stand where they have their dominant hand in the back to produce stronger power punches. That is usually why righties have their right hand in the back and lefties have their left hand in the back.

The Movement of a Southpaw vs Orthodox Fighter

Due to the foot placement of southpaw and orthodox fighters, the two move quite differently from one another. A southpaw fighter is more comfortable moving to their right, while an orthodox fighter is more comfortable going to the left.

Which Stance Do I Choose? Southpaw vs Orthodox

Before someone begins to participate in a striking class, they’ll often wonder which stance they should choose? Here are the two things that you need to remember when choosing which fighting stance that you’ll use.

What is Your Dominant Hand?

The first question that you’ll need to answer is what is your dominant hand? Meaning which hand do you predominantly use like writing or throwing a ball.

You may be more comfortable first learning boxing by staying in the stance that matches your dominant hand. This will enable you to learn the mechanics of striking first and develop a good base.

What Type of Techniques Do You Want to Use?

You will also need to ask yourself, what type of strikes do you want to use? Depending on what you want to land will dictate which stance you use.

For example, if you’re right handed, but can kick hard with your left, you might want to stand the southpaw stance. Staying in a southpaw stance would enable you to throw your left leg harder than you would if you had it in front.

Another good example is a fighter may have better jabs with their power hand than their lead hand. This may lead them to put their power hand in front to land fast and stiff jabs on their opponent.

How Can an Orthodox Fighter Beat a Southpaw Fighter? 

Southpaw fighters can be tricky to fight, but they are beatable. Here is how an orthodox fighter can gameplan to beat a southpaw fighter.

Be Wary of a Southpaw Fighter’s Experience

Before you spar with a southpaw fighter, you need to remember one important thing. A southpaw fighter has more experience fighting in an open stance against orthodox fighters than they would have.

There are statistically more orthodox fighters than southpaw fighters that train and fight. Which means that more than likely, this will be the case when first going against a southpaw.

If an orthodox fighter understands the likelihood of this, it’ll be easier for them to solve the problem ahead of them.

Keep Left Lead Foot On Outside of Opponent’s Right Lead Foot

Winning the foot battle is everything in the southpaw vs orthodox fighter battle. A right-handed fighter must keep their lead-left foot to the outside of their opponent’s lead-right foot.

By winning the foot placement battle, the right-handed fighter can land strikes with both hands. They also limit their left opponent’s punch selection as they’re only open to throwing their lead hand/leg.

But be mindful that your southpaw opponent isn’t just going to give it to you. You will need to either walk into it, punch your way in, or slip your way in. Whichever you choose will depend on the situation and what type of fighter your opponent is.

Reactions to Watch Out For

If you’re able to successfully win the foot placement battle, your southpaw opponent will fight to get it back. Doing either one of three things.

  • Run 
  • Pivot In
  • Punch In

A lefty can only go backwards or forward when they’ve lost the foot battle. Some may choose to back up and run in an attempt to break the control of their orthodox opponent.

Pivot in their right-handed opponent is another option a southpaw has. They can step to the inside of their orthodox opponent to make them throw their right hand.

When they do this, they can slip their opponent’s right and break their control. Allowing them to then try to regain control of the range and set up their combos.

How Can a Southpaw Fighter Beat an Orthodox Fighter?

How a southpaw fighter can beat up an orthodox fighter the exact way as mentioned above, but in reverse.  Here is how a southpaw fighter can beat an orthodox fighter.

Win the Foot Battle 

Just like we mentioned above, to beat an Orthodox fighter, you have to win the battle of foot placement. To beat righty, a lefty must get their right foot on the outside of their opponent’s left foot.

When they’re able to do this, it allows them to control the range of the fight and limit their opponent. The southpaw can then hit their opponent when their right-handed opponent can only hit with their lead hand. 

Beware the Right Hand

Any striking coach will tell you that to beat a southpaw, an orthodox fighter has to land their right hand. Southpaw fighters are well aware of this and cannot let them get in range to land it. Once an orthodox fighter finds a home for their right hand, they will control the fight.

Reactions For Southpaws to Watch Out For

A southpaw fighter will basically have to watch out for the same reactions as an orthodox fighter would.

Orthodox fighter’s will also try to break their left-handed opponent’s control by doing the same strategies.

  • Run
  • Pivot
  • Punch In

Which Fighting Stance is Better to Use: Southpaw vs Orthodox

Between these two stances, one is really not better than the other. A southpaw fighter can beat an orthodox fighter just as easily as an orthodox fighter can beat a southpaw.

Whoever wins an open stance battle like this will depend on primarily three things.

  • The Fighter’s Ability
  • Who Has The Better Gameplan
  • Who Is Able To Connect With Punches

Whichever fighter is able to do one, if not all of these things will most likely win the fight.

The Benefits of Switching Your Stance

As fighting has evolved, we are seeing a huge difference in how fighters strike. More fighters than ever are now favoring switching their stance instead of staying in a fixed stance. 

By learning to fight in both an orthodox and southpaw stance, they have even more possibilities to mix up their striking. They can use various types of strikes with both hands from different angles.

It also can completely stifle an opponent. They’re being hit with so many things from every angle, they will struggle to deal with a fighter who switches stance.